Are you struggling with customizing your LED strings for the perfect lighting setup? Whether it’s for your home, office, or any special project, learning how to cut, connect, and power LED strings correctly can transform your space. In this guide, we’ll walk you through the essentials, ensuring you get it right the first time.
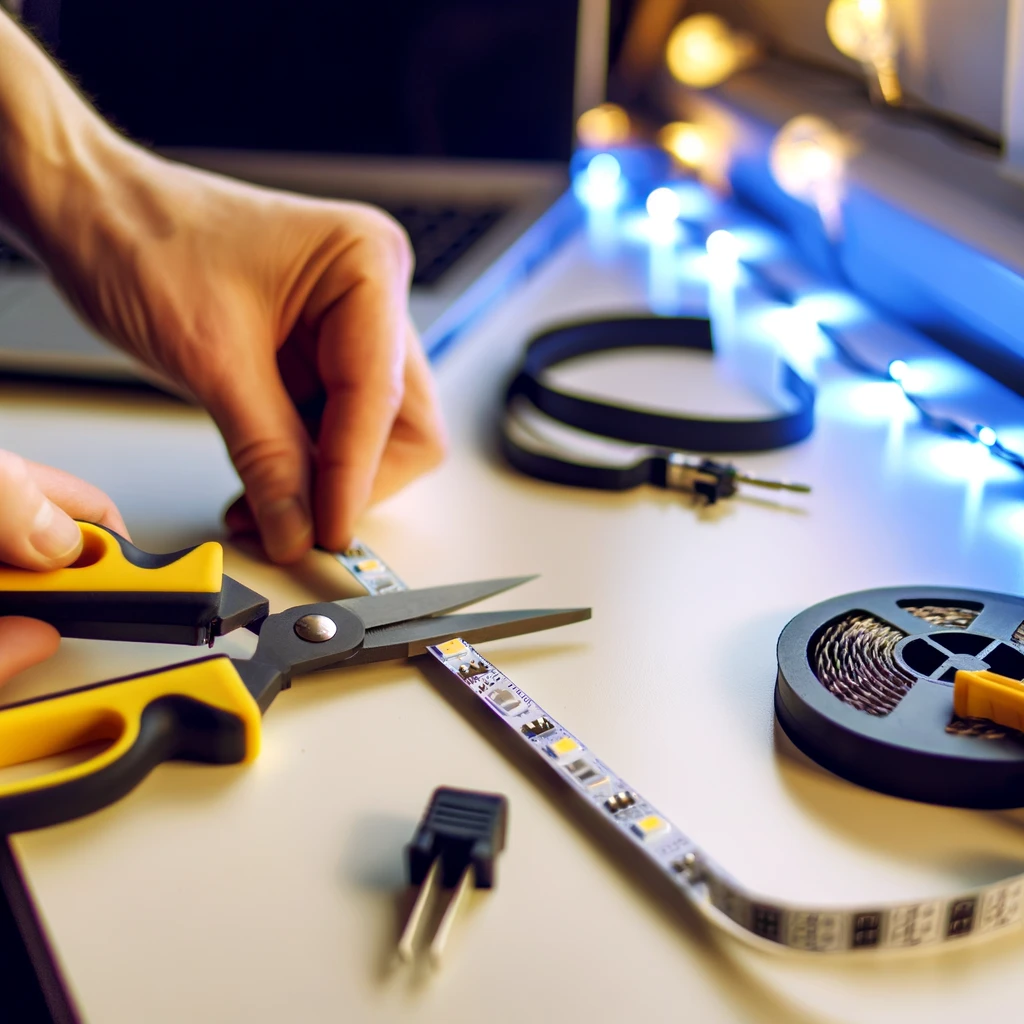
-Connect and power LED strips
LED strip lights are specifically designed for easy customization. To cut, simply use a pair of scissors to snip between the copper dots at the end of each LED. For connecting, either quick connectors or soldering can be employed, ensuring all LEDs work flawlessly. Powering your LED strings involves connecting them to a suitable power source, with options ranging from plug-in power supplies to hardwired connections, tailored to your project’s needs.
Let’s dive deeper into each step, ensuring your lighting project shines.
How Do You Cut a Connect and Power LED Strip?
Cutting, connecting, and powering LED strips might seem daunting at first, but with the right approach, it’s straightforward. Start by measuring the length you need and select the correct connectors. Look for the copper dots indicating where to cut, and then use scissors for a clean cut. Connecting the strips can be done with 4-pin 10mm connectors, ensuring a secure and functional setup.
Cutting the LED Strip
- Locate the Cut Marks: LED strips are designed with designated cut points along their length, usually marked with a line and scissors icon. These are the only places where you should cut the strip to ensure it still functions properly.
- Use a Sharp Pair of Scissors: Once you’ve identified where you need to cut, use a sharp pair of scissors to make a clean cut directly on the marked line.
Connecting the LED Strip
After cutting your LED strip to the desired length, you might want to connect it to another strip or a power connector.
- Using Connectors: For a solderless connection, you can use quick connectors (also known as clip-on connectors). Open the connector, insert the end of the strip into the connector ensuring it’s aligned with the connector’s metal contacts, and then close the connector to secure the strip.
- Single Color Strips: Typically use two-pin connectors.
- RGB Strips: Require four-pin connectors to maintain full color functionality.
- Soldering: For a more permanent connection, soldering the wires directly to the strip’s contact pads is an option. Tin the pads and wire ends with solder, then heat each pad and attach the wire, ensuring a good connection.
Powering the LED Strip
- Calculate the Power Requirement: Determine the total wattage your LED strip setup requires. This is usually given in watts per meter or foot. Ensure your power supply can provide a bit more than the total wattage needed.
- Select a Power Supply: Choose a power supply that matches the voltage of your LED strip (commonly 12V or 24V) and exceeds the total wattage requirement. Power supplies can be plug-in types for easy installation or hardwired for permanent setups.
- Making the Connection:
- For plug-in power supplies, you’ll likely use a DC connector that matches your strip’s connector (often a 2.1mm jack). Simply plug the connector into the strip (or into a connector attached to the strip) and then plug the power supply into an outlet.
- For hardwired power supplies, you may need to connect the power supply directly to your home’s electrical system. This is more complex and may require an electrician if you’re not familiar with home electrical work.
- Testing: After everything is connected, turn on the power to test your LED strip. If it doesn’t light up, check all connections, ensure the power supply is working, and verify that you’ve connected everything according to the correct polarity.
By following these steps, you can successfully cut, connect, and power your LED strip, allowing for a customized lighting solution tailored to your specific needs and preferences.
Can You Cut LED String Lights and Still Work?
Absolutely. LED strip lights are designed to continue working even after being cut, provided you cut at the designated points marked on the strip. This allows for customization without sacrificing functionality, ensuring your LED lights fit perfectly wherever you need them.
- Identify the Cutting Points: Look for the marked cutting points along the LED strip. These are usually indicated by a line across the strip, sometimes accompanied by a scissors icon. It’s crucial to cut only at these points to avoid damaging the strip’s circuitry.
- Use the Right Tools: Use a sharp pair of scissors or a knife to make a clean cut. This ensures that you do not damage the LED strip beyond the intended cutting point.
- After Cutting: Once cut, the portion of the LED strip that remains connected to the power source will continue to work as normal. The cut-off piece will not work unless it is connected to a power source via appropriate terminals or connectors.
- Reconnecting Cut Pieces: If you wish to use the section of the strip that was cut off, you’ll need to use a compatible LED strip connector. These connectors typically clip onto the ends of the strips where you made your cuts, allowing you to connect the cut sections to a power source or back to another section of the strip.
- Safety and Functionality: Ensure that any exposed wires or cut ends are properly insulated to prevent short circuits. Additionally, when planning to cut and reconnect strips, ensure that your power supply can handle the total wattage of all connected LED strips.
- Considerations for Waterproof Strips: If you’re cutting waterproof LED strips, you’ll need to reseal the cut ends to maintain the waterproof integrity. This often requires silicone sealant or heat shrink tubing.
In summary, yes, you can cut LED string lights, and they will still work, provided you cut at the designated points and take the necessary steps to connect them properly to a power source. This feature allows for greater flexibility in customizing your lighting projects to fit specific spaces and designs.
Can I cut the LED copper wire string lights still work?
Yes, you can cut LED copper wire string lights and have them still work, but with a few important caveats:
Cut Points:
Like LED strip lights, some LED copper wire string lights are designed with designated cut points, which are safe places to cut without damaging the entire string. However, because copper wire lights are often more delicate and designed differently than traditional LED strips, these cut points might not be as clearly marked or even present in the same way. It’s essential to check the manufacturer’s instructions to see if and where the string can be safely cut.
Non-Parallel Wiring:
Many LED copper wire string lights do not have parallel wiring, meaning that cutting the wire at any point that’s not designed as a cut point can cause the entire string to stop working. This is because the electrical circuit is interrupted.
- In non-parallel (or series) wiring, each LED light in the string is connected one after another along the same circuit. This means the electrical current flows through each LED in sequence from one end of the string to the other. This configuration is common in simpler or more cost-effective LED string lights.
- The Impact of Cutting:When you cut a string of LEDs wired in series at a non-designated point (i.e., anywhere that isn’t specifically intended to be cut, often indicated by manufacturer marks), you’re essentially interrupting the electrical circuit. Since the current must flow through each LED in sequence to illuminate the whole string, breaking the circuit at any point prevents the current from completing its path. As a result, the entire string of lights can stop working because the electrical flow has been disrupted.
- Why It Matters:Understanding the wiring configuration of your LED copper wire string lights is crucial if you plan to customize them by cutting. Cutting series-wired lights without proper planning or at the wrong point can render the entire string inoperative, as the continuous path for the current is essential for the lights to function.
- For LED lights designed with parallel wiring, cutting one part of the wire doesn’t necessarily stop the entire string from working because each LED or group of LEDs operates independently of the others. However, many LED copper wire string lights are not designed this way due to the simplicity and cost-effectiveness of series wiring.
- Conclusion:Before cutting any LED copper wire string lights, it’s important to determine whether they are wired in parallel or series and to only cut at manufacturer-designated points to avoid inadvertently disabling the entire string. For series-wired lights, any customization involving cutting requires careful planning and understanding of the circuitry to ensure that the modification doesn’t interrupt the electrical flow needed to power the lights.
Waterproofing:
If your LED copper wire lights are waterproof, cutting them might remove this feature from the cut ends unless properly sealed again.
- The statement highlights a crucial consideration when working with waterproof LED copper wire lights. Waterproofing in such lights is achieved through various means, including coatings, sealants, or specialized waterproof enclosures that protect the electrical components and LED bulbs from water damage. This waterproof feature is essential for outdoor use or in environments where the lights might be exposed to moisture, ensuring they remain functional and safe over time.
- When you cut waterproof LED copper wire lights to customize their length or fit them into a specific area, the act of cutting can compromise the waterproof integrity at the cut ends. This is because the protective barrier that was preventing water ingress is now interrupted. The cut ends are exposed, making them vulnerable to water, which could lead to short circuits, reduced lifespan of the LED lights, or even safety hazards if water penetrates the electrical components.
- To maintain the waterproof feature after cutting, the exposed ends need to be properly sealed. This can involve using waterproof sealants, heat-shrink tubing that can be sealed with a heat gun, or silicone end caps that protect the cut ends from water exposure. Sealing the ends restores the continuity of the waterproof barrier, ensuring that the modified section of the LED copper wire lights remains as protected against water as the uncut portions.
- Therefore, if you plan to cut waterproof LED copper wire lights for any project, it’s important to plan for resealing the cut ends to preserve their water-resistant properties. This step is crucial for maintaining the functionality, safety, and longevity of the lights, especially if they will be used in wet or outdoor conditions.
Power and Voltage:
Cutting the string can also affect its power and voltage requirements. The removed section might alter the total resistance of the string, which could potentially affect performance or compatibility with the original power supply.
- This statement touches on an important electrical principle that comes into play when modifying LED string lights by cutting them. When you cut a section from an LED string, especially those wired in series, you are effectively altering its electrical characteristics, specifically its total resistance. This can have several implications for how the string operates and interacts with its power source.
- Understanding Resistance in LED Strings
- In an electrical circuit, such as an LED string light, resistance is a measure of how much the material or device opposes the flow of electric current. In series circuits, total resistance is the sum of individual resistances along the circuit. Since each LED adds some resistance to the circuit, removing a section of the string decreases the total resistance.
- Impact on Power and Voltage
- Voltage Requirements: LEDs require a specific voltage to operate correctly. In a series circuit, the total voltage supplied is divided among the LEDs. Removing some LEDs (by cutting the string) means the voltage is divided among fewer LEDs, potentially increasing the voltage each remaining LED receives. This can lead to LEDs being driven harder than designed, which may shorten their lifespan or cause immediate damage.
- Power Consumption: Power (measured in watts) in an electrical circuit is calculated based on the voltage across the circuit and the current flowing through it (P=VI). Altering the resistance of the circuit by cutting it changes the current flow, which can affect the total power consumption of the LED string. A decrease in total resistance increases the current for a given voltage (Ohm’s Law: V=IR), potentially leading to higher power consumption per remaining LED.
- Compatibility with Original Power Supply
- The original power supply for an LED string is chosen based on the total voltage and power requirements of the unmodified string. Altering the string by cutting it might make the original power supply less suitable. For instance, if the modification leads to a significant increase in current draw, the power supply might not be able to provide sufficient current, or it might operate less efficiently.
- Considerations
- To ensure optimal performance and longevity of the LED string lights after cutting:
- Check Compatibility: Ensure the remaining section of the LED string is compatible with the original power supply, considering the altered electrical characteristics.
- Use Resistors if Necessary: In some cases, adding resistors can help manage the changes in voltage and current to protect the remaining LEDs.
- Consult Manufacturer’s Instructions: Many LED strings are designed with modifications in mind, and manufacturers might provide guidelines or kits for safely cutting the string and adding or removing sections.
In conclusion, cutting an LED string can affect its power and voltage requirements due to changes in total resistance, which could potentially affect performance or compatibility with the original power supply. Understanding and addressing these changes is crucial for maintaining the functionality and safety of the modified LED string.
Reconnecting:
If you plan to reconnect the cut pieces, you’ll need to do so with care, ensuring a solid electrical connection. This might involve soldering or using specific connectors designed for the job, and it may not always be straightforward due to the delicate nature of copper wire lights.
Reconnecting cut pieces of an LED copper wire string lights requires careful handling and precision to ensure the integrity and functionality of the lights are maintained. Here’s a step-by-step guide and considerations for effectively reconnecting cut sections:
- Step 1: Prepare the Cut Ends
- Strip Insulation: If the cut ends are insulated, carefully strip a small section of the insulation from each end to expose the copper wire. Use a wire stripper or a sharp blade, being careful not to damage the copper wire.
- Step 2: Choose Your Method of Reconnection
- Soldering: For a durable and reliable connection, soldering is recommended. It creates a permanent bond between the wires.
- Tin the Wires: Apply a small amount of solder to the exposed ends of the wires. This process, called ‘tinning,’ helps make the actual soldering process smoother.
- Solder the Connection: Heat the tinned wire ends with a soldering iron and apply additional solder to join them together. Ensure the solder flows freely and covers the joint adequately.
- Insulate the Joint: Once the solder has cooled, cover the connection with heat-shrink tubing or electrical tape to prevent short circuits.
- Connectors: If soldering is not an option, use connectors specifically designed for LED copper wire lights.
- LED Connectors: These can range from simple twist-on connectors to more sophisticated, clamp-style connectors that securely hold the wires without the need for stripping.
- Ensure Compatibility: Make sure the connectors are compatible with the gauge of your copper wire lights for a secure fit.
- Soldering: For a durable and reliable connection, soldering is recommended. It creates a permanent bond between the wires.
- Step 3: Test the Connection
- Before proceeding with insulation or installation, test the connection by powering on the lights. This step ensures that the electrical connection is solid and that the lights function as expected.
- Considerations
- Delicate Nature of Copper Wires: LED copper wire lights are more delicate than typical LED strips, requiring gentle handling during stripping, soldering, or connecting to avoid breaking the wires.
- Insulation and Waterproofing: If your LED copper wire lights were initially waterproof, consider how to restore this protection after reconnecting. Using waterproof connectors, or carefully applying waterproof silicone sealant over the insulated joint, can help maintain water resistance.
- Electrical Safety: Always ensure the power supply is disconnected before attempting any reconnection work to avoid electric shock or damage to the lights.
Reconnecting cut pieces of LED copper wire string lights can be a meticulous task. However, with the right tools and techniques, you can effectively restore the functionality of your lights while maintaining their aesthetic appeal. Whether you choose to solder or use connectors, ensuring a solid electrical connection is key to a successful reconnection.
How Do You Power an LED String?
Powering LED strings is a matter of choosing the right power supply. Most LED strips come with a female 2.1mm connection point, making it easy to connect to plug-in power supplies. For a more permanent setup, hardwired power supplies might be the way to go, offering a direct and reliable power source for your LED lighting.
Powering an LED string involves selecting a suitable power supply that matches the voltage and current requirements of the LED string to ensure it operates correctly and safely. Here’s a step-by-step guide on how to power an LED string:
1. Determine the Voltage Requirement
First, you need to know the voltage requirement of your LED string. Common voltages for LED strings are 12V or 24V DC. This information is usually provided by the manufacturer and can be found on the packaging or product description.
2. Calculate the Power Consumption
Calculate the total power consumption of your LED string to choose the appropriate power supply. The power consumption is often listed in watts (W) on the product information. If you’re using multiple strings, add up the power consumption of each string to get the total wattage required.
3. Choose a Power Supply
Select a power supply that matches the voltage requirement of your LED string and provides at least the total wattage needed. It’s advisable to choose a power supply with a slightly higher wattage rating than your calculation to ensure it can comfortably handle the load without overheating.
4. Connect the LED String to the Power Supply
- For Plug-in Power Supplies: Many LED strings come with a compatible plug that can be directly connected to the power supply. Ensure the plug matches the power supply’s output jack.
- For Hardwired Power Supplies: Some installations may require you to hardwire the LED string to a power supply. This involves connecting the positive (usually red) and negative (usually black) wires from the LED string to the corresponding outputs on the power supply. Always ensure the power supply is disconnected from the mains while making these connections.
5. Test Your Connection
Once everything is connected, plug in the power supply (for plug-in types) or switch on the power at the mains (for hardwired types) to test the LED string. If the lights do not turn on, double-check your connections and ensure the power supply is switched on and working.
Safety Tips
- Read Manufacturer’s Instructions: Before starting, carefully read through any instructions or specifications provided by the manufacturer of your LED string.
- Check for IP Ratings: If the LED string is to be used outdoors or in a moist environment, ensure both the LED string and power supply are appropriately rated for outdoor use (look for IP ratings).
- Electrical Safety: If unsure about connecting or operating electrical devices, consult with or hire a qualified electrician to ensure safe installation.
By following these steps, you can safely and effectively power your LED string, ensuring it lights up correctly and lasts for its intended lifespan.
How Do You Connect LED Strips to Power?
Connecting LED strips to a power source is a critical step in setting up your lighting project. Here’s a comprehensive guide to help you through the process safely and effectively:
Step 1: Determine the Voltage and Power Requirements
- Voltage Compatibility: Most LED strips operate on low voltage, typically 12V or 24V DC. Ensure your power supply matches the voltage requirement of your LED strip to avoid damage.
- Calculate Total Power: Determine the total wattage your LED strip will consume. This information is usually provided per meter or foot. Multiply this by the total length of the LED strip you will be using to get the total wattage. It’s advisable to choose a power supply that can handle at least 20% more than your calculated wattage to ensure reliability and longevity.
Step 2: Choose a Power Supply
Select a power supply that matches the LED strip’s voltage requirement and exceeds the total wattage requirement. Power supplies come in various forms, including plug-in adapters and hardwired drivers.
Step 3: Prepare the LED Strip
- Cutting (If Necessary): If you need to cut your LED strip to fit a specific area, make sure to cut along the designated cut lines to avoid damaging the LEDs.
- Exposing the Contacts: For strips that need to be wired to a power supply, you may need to expose the copper contacts. This might involve removing a small section of the waterproof coating (if applicable) and possibly soldering wires to these contacts for a secure connection.
Step 4: Connect to Power Supply
- Direct Connection: If your power supply and LED strip both have compatible connectors, you may be able to connect them directly without any additional wiring.
- Wiring Required: For a more permanent setup or if direct connection isn’t possible, you’ll likely need to wire the LED strip to the power supply. This involves connecting the positive (+) and negative (-) wires from the strip to the corresponding outputs on the power supply. Use wire nuts or soldering to ensure a secure and safe connection.
- Red Wire: Typically the positive (+) wire.
- Black Wire: Usually the negative (-) wire.
Step 5: Test Your Connection
Before finalizing your setup, plug in your power supply and test the LED strip to ensure it lights up correctly. This is the time to check for any issues with the connections or the functionality of the LED strip.
Safety and Tips
- Avoid Mixing Voltages: Never mix LED strips of different voltages on the same power supply.
- Waterproofing: If your installation is outdoors or in a moist environment, ensure both your LED strip and connections are properly waterproofed or use strips rated for outdoor use.
- Cooling: Ensure your power supply is in a well-ventilated area to prevent overheating.
- Professional Help: If you’re unsure about electrical connections or the specifications of your LED strip and power supply, consult with or hire a professional electrician to ensure a safe installation.

